.png)
 2 years ago
109
2 years ago
109 BOOK THIS SPACE FOR AD
ARTICLE AD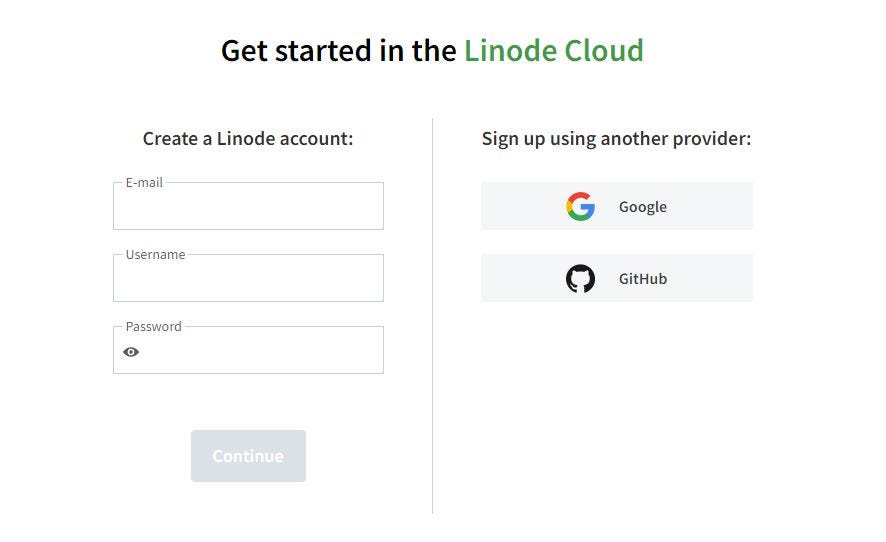
Before your Sign-up on Linode, As you already know running a server on the cloud is not free. I know... I know,” But Nafish the title says it’s FREE “.
Let me tell you every good thing comes with a price. But don’t worry Signing-Up on Linode is as good as their welcome gift, they provide a $100 Credit for you to spend on your account.
Oh and make sure you have a valid Credit/ Debit card, Linode uses it to verify the authenticity of the user.
Note: If you don’t have a valid card use Jupiter or FI card, It’s Free.

After successfully creating an account click on Create > Linode.

Select an Image you are comfortable with.

This is important, make sure you select the region(Linode data-centers) nearest to your location.

Now select the “Shared CPU” category, it’s the cheapest and best for normal usage. From there I prefer Nanode 1GB it’s $5 a month but you can choose depending on your need, Keep in mind you are spending your Free $100 Credit given by Linode. So Spend Well.

Lastly set a label name for your instance and set a Root password for your SSH. you are almost done.

Click Create. Now sit back and relax, Linode is setting up your server. Once done the status on your Dashboard says “Running”.
It’s time to connect to our very own machine running on someone else system with more and fast internet, high processing power and running 24/7 which you can access from anywhere….
Okay... Okay, So there are two ways we can connect to the server, SSH or a full GUI using RDP. but for the sake of simplicity, we will not cover GUI in this post may be another time.
Linode provides their own console called Lish Console but I prefer my own terminal, you can use {Linux: Terminal, Windows: Powershell, Mac: Terminal, Android: Termux}
open up your terminal and type
madking:~$ ssh root@server_ip
Type your root password and you are successfully logged in. One thing to keep in mind is that you can’t use a GUI application like Burpsuite using SSH. You can after configuring RDP.
What you can do is use X Forward to use X applications for now. just put -X.
madking:~$ ssh -X root@server_ip
Now run “xeyes” to test and if you are good you will see eyes on your screen tracking your cursor.
Now that our server is up & running, You can install the tools and build your lab but there is something more.
here is a small list of things you can do other than bug bounty:
Make a Cloud StorageSetup Mail ServerMake VPNReverse Shell ListenerGame Server (Minecraft or CS:GO)VS Code serverMetasploit SessionsThe possibility is endless. If you have any Idea please comment.
We will cover some topics from the above list in upcoming posts, So Follow me to get updated.


 Bengali (Bangladesh) ·
  English (United States) ·